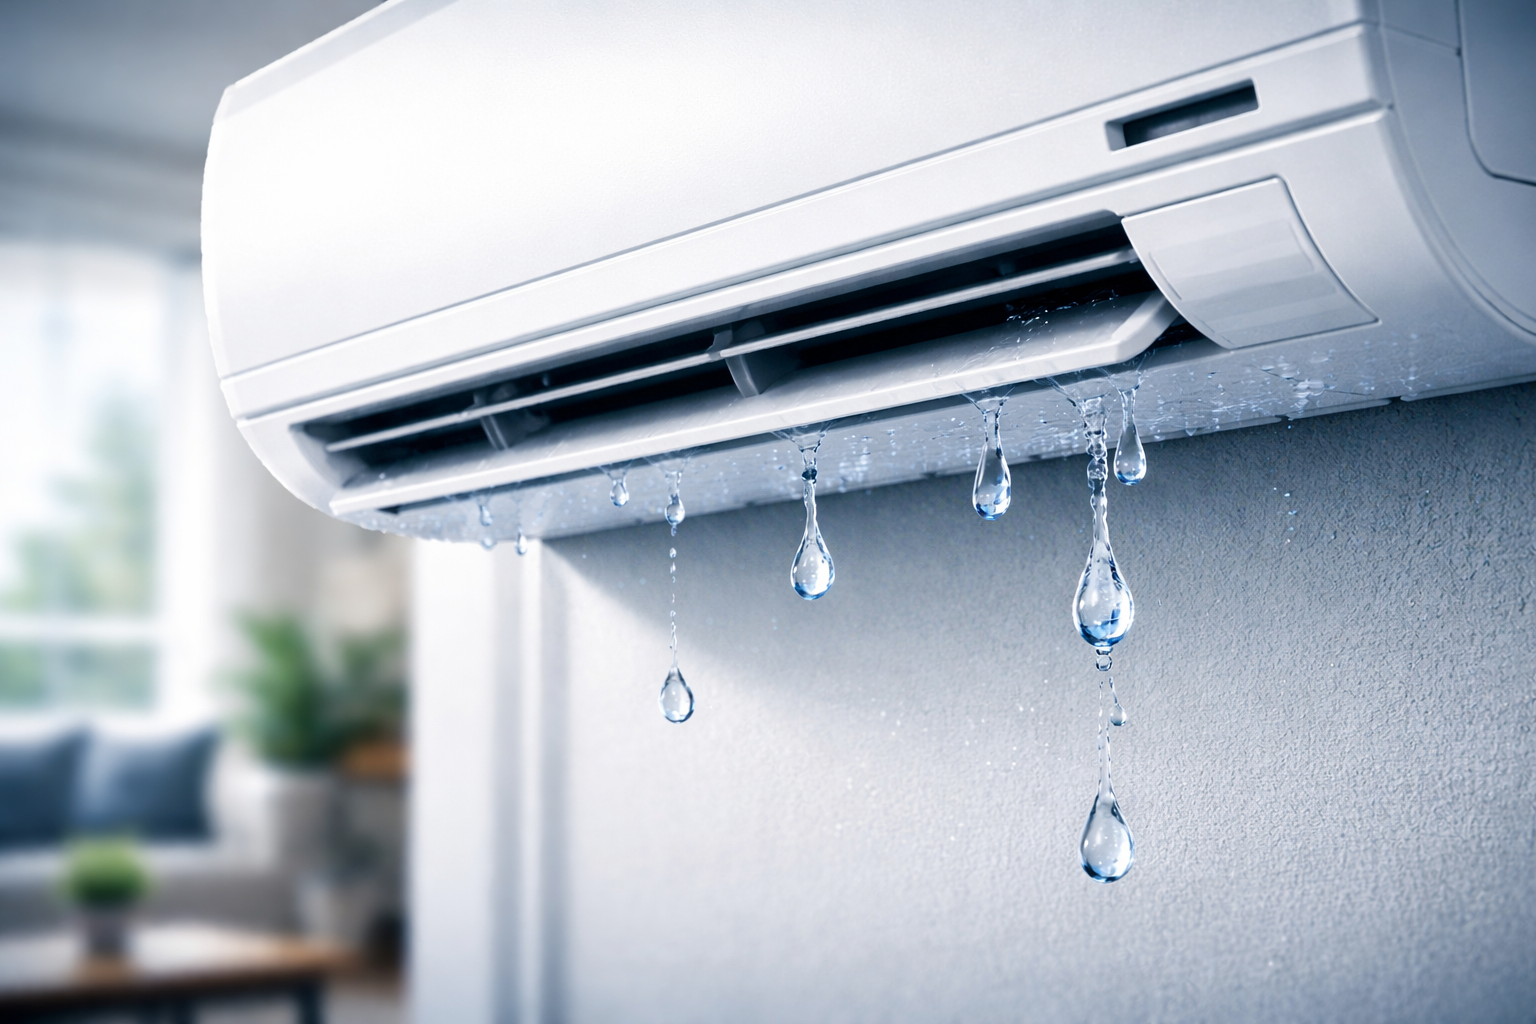
Why Is My Mini Split Leaking Water Inside? 5 Common Causes
Mini Split Leaking Water Inside?
Fix It In 15 Minutes (No Plumber)
STOP! Read this first. Don’t call a tech yet. 90% of leaks are caused by a $0.50 issue you can fix with a vacuum cleaner.
1 Immediate Triage: Do This NOW
- Turn the Unit OFF: Stop the condensation process immediately.
- Place a Bucket: Catch the drip to save your drywall/floor.
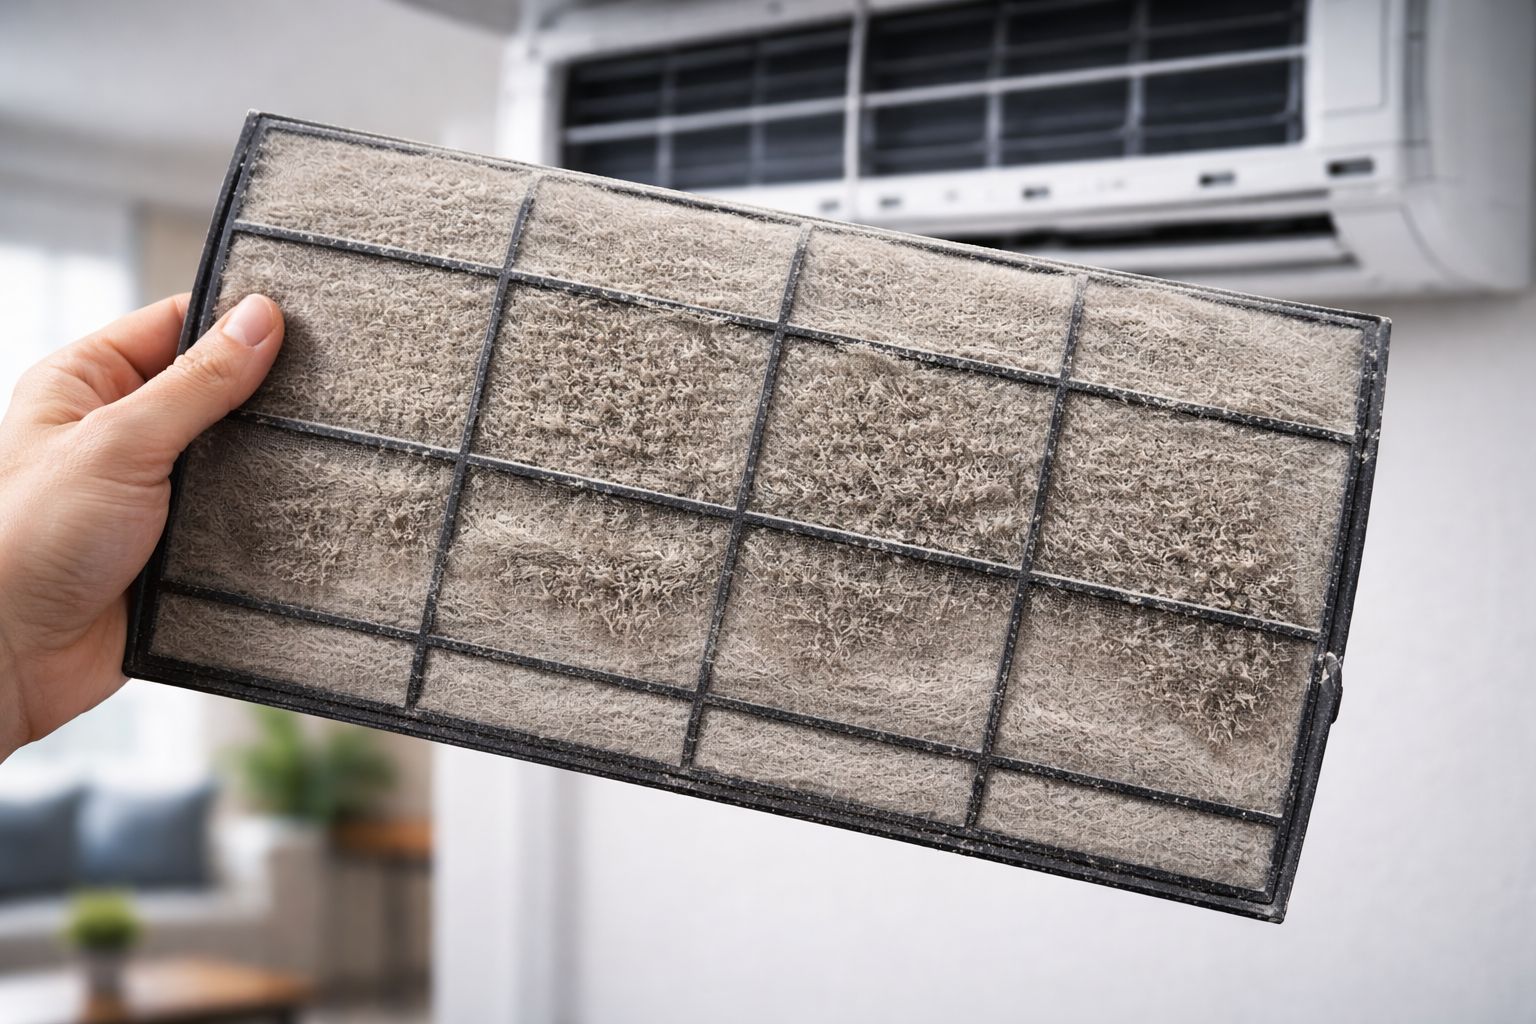
- Check the Filter: Is it caked in dust? (If yes, jump to Reason #2).
Leaking water is the #1 most common issue with ductless mini splits. It feels like a disaster, but it is rarely a broken unit. It is usually just… slime.
Reason #1: The “Slime Monster” (Clogged Drain)
Inside your AC, cold coils pull moisture from the air. This water drips into a pan and drains out through a white tube. Over time, algae and mold grow in that dark, wet tube, creating a blockage.

The Shop Vac Method
- Step 1: Go outside to where the white drain tube exits the wall.
- Step 2: Place the nozzle of a Wet/Dry Shop Vac over the end of the tube.
- Step 3: Use your hand or duct tape to create an air-tight seal.
- Step 4: Turn on the vacuum for 30 seconds.
Result:
You will suck out a glob of “bio-slime.” The water flow will restore instantly.
Reason #2: The Ice Block (Dirty Filters)
If your filters are dirty, air cannot flow. The coils get too cold and freeze into a solid block of ice. When the unit turns off, that ice melts faster than the drain can handle.
Reason #3: Gravity Failure (Bad Install)
Common in New Installations (First 30 days)
Water doesn’t run uphill. If your DIY installer drilled the hole straight through the wall (instead of angling it slightly down), water will trap inside the unit.
How to verify:
Place a spirit level on top of the indoor unit. It should be perfectly level. If the unit is level but leaking, the drain hose inside the wall might be kinked.
Check our Installation Guide for correct slope angles.Reason #4: Low Refrigerant (The Expensive One)
If your filters are clean but the coils are still freezing up, you likely have a refrigerant leak.
Is It Freezing Or Just Undersized?
An undersized unit will run 24/7, causing coils to freeze over. Before you pay $500 for a leak test, check if your unit is actually big enough for the room.
Check Sizing CalculatorReason #5: The Cracked Pan
Rare, but happens with old units. The plastic tray underneath the coils can crack.
The Test: With the cover off, slowly pour a bottle of water over the coils. Use a flashlight to see exactly where the drips originate. If it drips from the center of the plastic, the pan is broken.
Maintenance: The “Vinegar Flush”
Once a year, pour 1 cup of distilled white vinegar into the drain pan (carefully). This kills the mold and algae before it forms a clog.
You Will Need:
-
Wet/Dry Shop Vac
-
Spirit Level
-
White Vinegar