Where to Install Mini Split? Best & Worst Wall Locations (2026 Guide)
You bought the unit. You have the tools. Now you are standing in your living room with a tape measure, wondering: “Where exactly should I put this thing?”
Placement is not just about aesthetics. If you mount your mini split in the wrong spot, it will:
- Read the temperature incorrectly (short cycling).
- Blow cold air directly on your face (uncomfortable).
- Drain poorly (causing leaks).
In this guide, I will show you the “Golden Rules of Airflow” so you can pick the perfect spot for maximum comfort and efficiency.
The 3 Golden Rules of Placement 📏
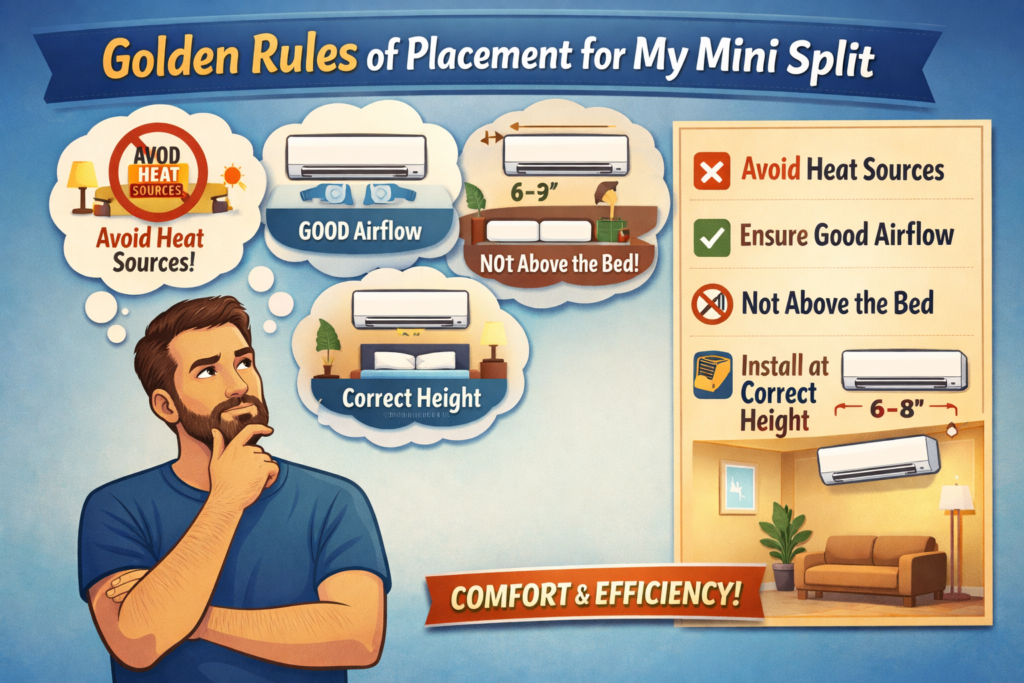
Before you drill any holes, check these three requirements:
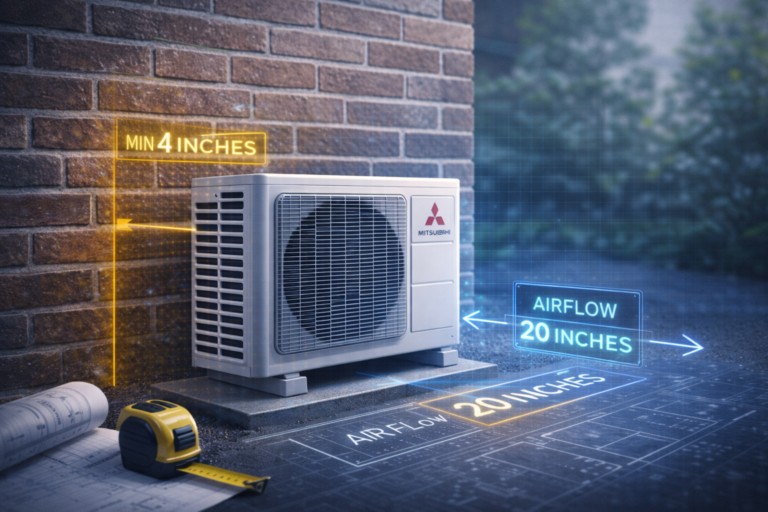
1. The “6-Inch Rule” (Ceiling Gap)
Never mount the unit flush against the ceiling. Mini splits suck air in from the top and blow it out the bottom. You must leave at least 6 inches (15 cm) of clearance between the top of the unit and the ceiling.
- If you ignore this: The unit will starve for air, overheat, and efficiency will drop by 30%.
2. The “Exterior Wall” Preference
Ideally, mount the indoor unit on an exterior wall.
- Why? It makes running the drain pipe and copper lines straight outside incredibly easy.
- Can I mount on an interior wall? Yes, but you will need a condensate pump to push the water up and over, which adds noise and complexity.
3. Strength & Studs
The unit weighs 20-30 lbs. Do not hang it on drywall alone. Use a stud finder to locate the wooden beams, or use heavy-duty toggle bolts if you absolutely must use drywall.
Best & Worst Spots by Room 🏠
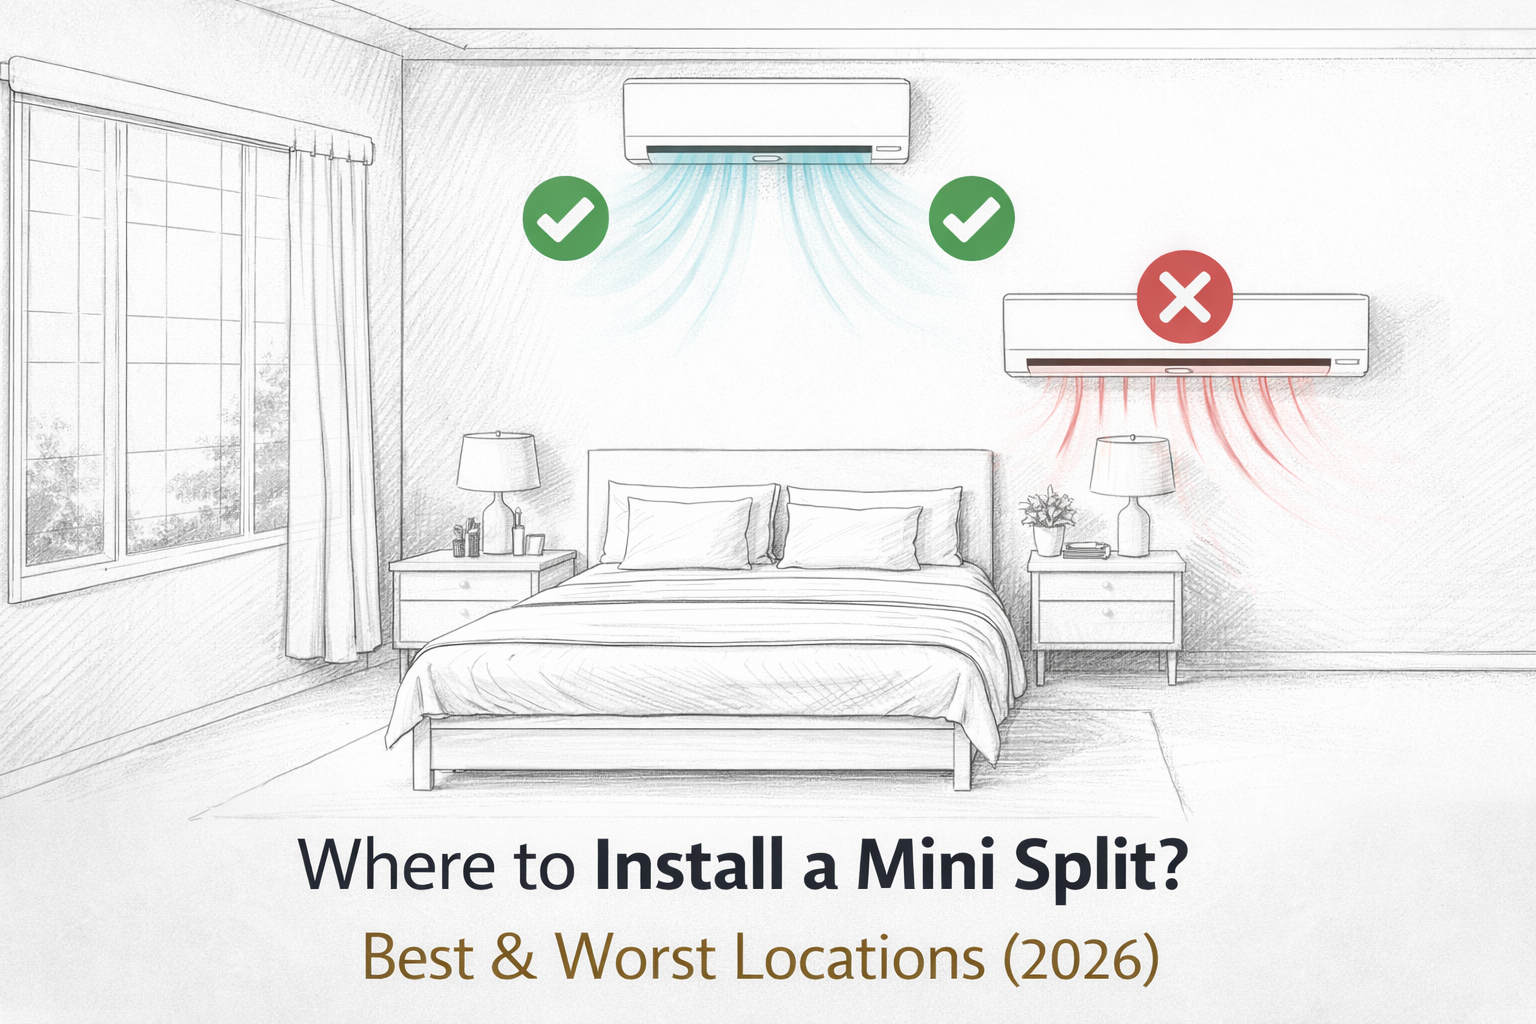
🛌 In the Bedroom
- ❌ The Worst Spot: Directly above the head of your bed.
- Reason: If it leaks (and they sometimes do), it drips on your face. Also, cold air falling on you while you sleep causes sinus issues.
- ❌ The Bad Spot: Opposite a mirrored closet.
- Reason: The infrared remote signal might bounce off the mirror and confuse the unit.
- ✅ The Best Spot: On the wall perpendicular to the bed, or above a window, aiming the air toward the foot of the bed.
📺 In the Living Room
- ❌ The Worst Spot: Directly above a TV or sensitive electronics.
- Reason: Water leaks = dead TV. Also, electronics generate heat, which tricks the AC sensor into thinking the room is hotter than it is.
- ✅ The Best Spot: Centered on the main wall, high up, aiming into the open space.
🍽️ In the Kitchen
- ❌ The Worst Spot: Near the stove or oven.
- Reason: Grease and oil from cooking will get sucked into the filters, clogging the unit in weeks.
- ✅ The Best Spot: In the dining area, blowing towards the kitchen but keeping a safe distance from the stove.
Hallways: The “Ghost” Trap 👻
Many people try to save money by putting one big unit in a hallway to cool three bedrooms. Does it work? No. Cold air is heavy. It sinks. It will not turn right or left into the bedrooms efficiently. The hallway will be freezing (60°F), and the bedrooms will stay hot (80°F).
- Solution: Put a small head in each bedroom (Multi-Zone) or use fans to push the air.
Height Matters: How High?
- Cooling Mode: Cold air sinks. Mount the unit high up (at least 7 feet) so the cold air drifts down over the room.
- Heating Mode: Heat rises. If you only care about heating, mounting it slightly lower (like a radiator) is technically better, but most people stick to high mounting for aesthetics.
Conclusion: Measure Twice, Drill Once
Once you drill that 3-inch hole through your wall, there is no going back. Take a step back. Imagine the airflow. Ensure you have the 6-inch ceiling gap.
Still planning your system? Placement doesn’t matter if the unit is too weak to cool the space. 👉 Double-check your room size with our Calculator