7 Costly Mini Split Installation Mistakes to Avoid (That Will Ruin Your Warranty)
You bought the unit. You have the tools. You are ready to save $4,000 by installing it yourself. Stop. One small mistake during installation can turn your brand new $1,500 mini split into a giant paperweight. I have seen homeowners make simple errors—like skipping the vacuum step or kinking a line—that destroyed the compressor in less than a month.
Do not be a statistic. Here are the 7 most deadly installation mistakes and exactly how to avoid them.
1. Undersizing (Or Oversizing) the Unit 📏
This is the #1 reason for complaints.
- Too Small: It runs 24/7 and never cools the room.
- Too Big: It “short cycles” (turns on/off every 5 minutes), leaving the room humid and clammy.
The Fix: Don’t guess. Don’t use “Rule of Thumb.” Calculate it precisely based on your ceiling height and insulation. 👉 Use our Free Mini Split Sizing Calculator Here
2. The “No Vacuum” Sin (Non-DIY Units) 🚫
If you are installing a Pioneer, Senville, or Daikin, you MUST use a vacuum pump. Inside the copper lines, there is air and moisture. If you release the refrigerant without sucking that air out first, the moisture will mix with the oil and create acid. This acid eats your compressor from the inside out.
- Exception: This does not apply to MrCool DIY, which comes with pre-charged lines.
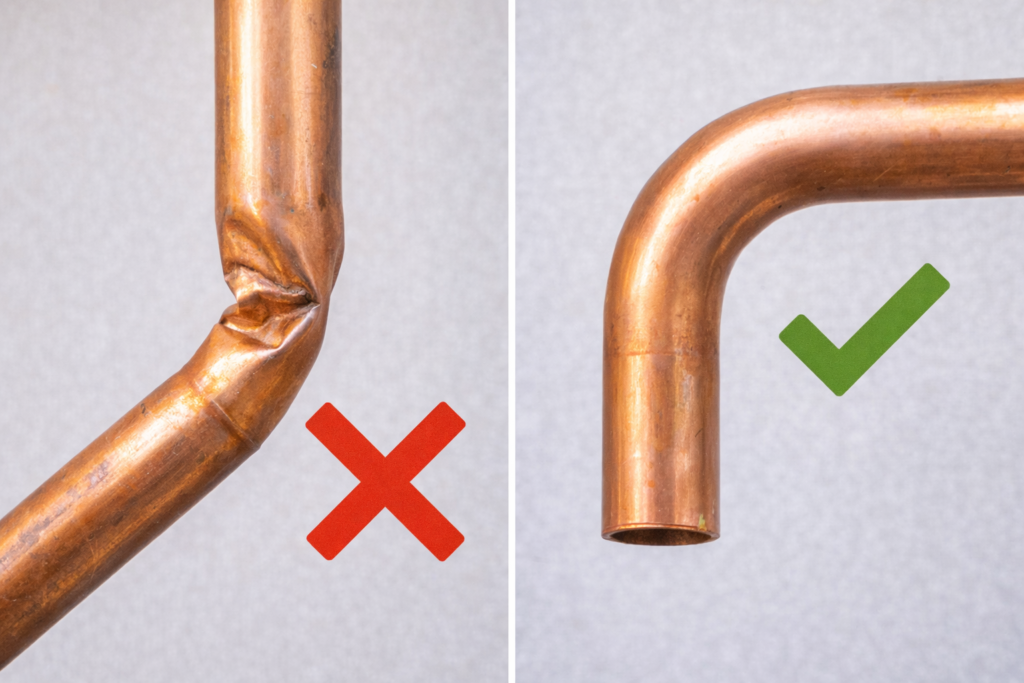
3. Kinking the Copper Lines 🥨
The copper pipes connecting the indoor and outdoor units are soft and delicate. If you bend them too sharply by hand, they will “kink” (fold like a soda straw).
- The Result: The refrigerant flow is blocked. The unit will starve and die.
- The Fix: Use a simple, cheap spring bender tool, or be extremely gentle when bending corners.
4. Mounting on a Hollow Wall (Vibration) 🔊
Mini splits are quiet, but they do vibrate slightly. If you mount the indoor unit on a thin interior wall without hitting a stud (wooden beam), the wall acts like a drum skin. Your silent AC will turn into a buzzing annoyance.
The Fix: Always use a stud finder. If you can’t hit two studs, use heavy-duty toggle bolts (SnapToggles).
Still researching mini splits?
Start here 👉 The Ultimate Mini Split Guide (2026)
5. Ignoring Drainage (The Water Leak) 💧
In summer, your AC pulls gallons of water out of the air. That water needs to go somewhere. A common rookie mistake is running the drain hose uphill or letting it sag. Gravity doesn’t work uphill. The water will back up and pour down your white wall.
Basement Install? You cannot rely on gravity. You need a pump. 👉 Read our Basement & Condensate Pump Guide
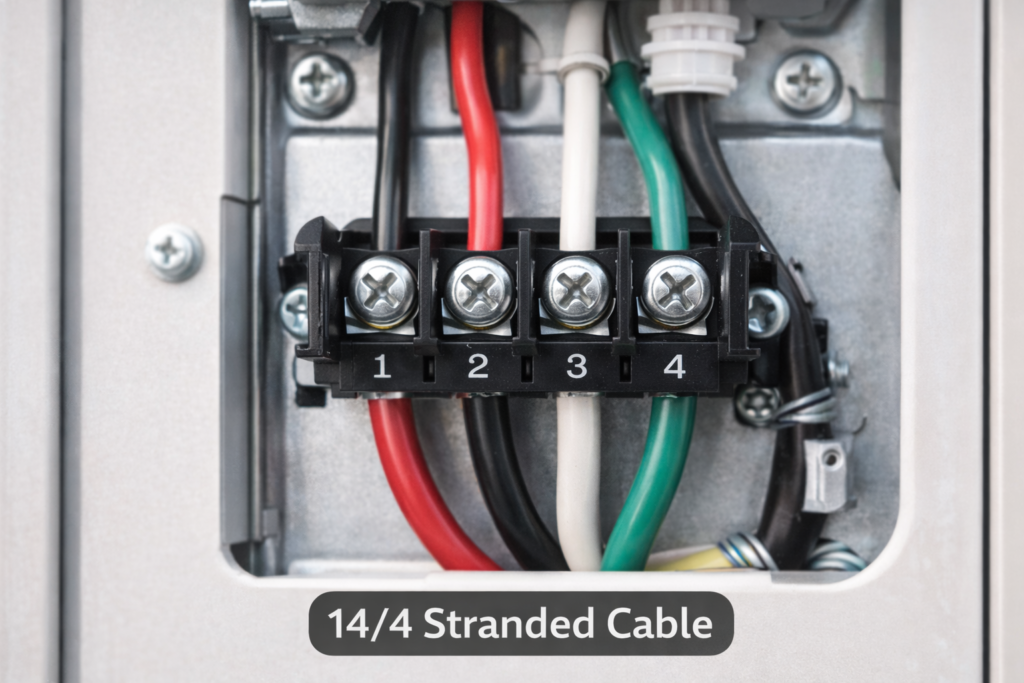
6. Electrical: The Wrong Wire Gauge ⚡
- 12k BTU unit: Usually needs 15 Amp / 14 AWG wire.
- 24k BTU unit: Might need 20-30 Amp / 10 AWG wire.
- Communication Wire: This is the wire between the indoor and outdoor units. Do NOT use thermostat wire. You must use stranded 14/4 shielded cable.
Using thin wire creates a fire hazard and drops voltage, killing the sensitive electronics.
7. Tightening Flares Without a Torque Wrench 🔧
Leakage is the enemy.
- Too Loose: Refrigerant leaks out in a week.
- Too Tight: You crack the soft copper flare face.
You cannot do this by “feel.” You need a Torque Wrench set to the exact Newton-Meters listed in the manual. This $40 tool saves you a $500 refill service call.
Conclusion: Know Your Limits
If this list scares you, you have two options:
Buy a True DIY Unit: Brands like MrCool DIY eliminate the vacuuming, flaring, and torque wrench steps entirely. 👉 Read our MrCool vs. Pioneer Review
Hire a Pro: But be prepared to pay $5,000+. 👉 Check our Installation Cost Breakdown