Ductless Mini Split Installation:
What Every Homeowner Must Know Before Hiring a Contractor (2026)
Most homeowners get 3 wildly different quotes and have no idea why. After 15+ years installing ductless systems, I’m going to tell you exactly what drives the cost, what the 7-step process actually looks like, and the 9 mistakes that void your warranty before the first summer is over.
Jump to Section
Who Wrote This — and How We Know What We Know
There are hundreds of ductless mini split articles online written by people who have never touched a torque wrench. This guide is different. Every number here comes from field experience, real job invoices, or verified AHRI/DOE data.
What Is a Ductless Mini Split System?
A ductless mini split is a two-component heating and cooling system: an outdoor condenser and one or more indoor air handlers, connected by a refrigerant line set running through a small hole in the wall. No ductwork. No central air. No major construction.
Unlike a window unit (which is just a fan blowing cold air), a mini split uses inverter-driven compressor technology — it modulates output continuously like a dimmer switch instead of cycling on/off. This is why mini splits are 30–50% more efficient than window units and eliminate temperature swings. See our complete What Is a Mini Split guide for a deeper explanation.
How It Cools
The refrigerant absorbs heat from indoor air and pumps it outside via the condenser. Works like a refrigerator in reverse — moving heat rather than creating cold.
How It Heats
In heat pump mode, the refrigerant cycle reverses — extracting heat energy from outdoor air (even at -13°F) and bringing it inside. 2–4x more efficient than electric resistance heat.
How It Dehumidifies
The evaporator coil naturally condenses moisture from the air. Unlike central AC, mini splits dehumidify continuously — even at low speeds — dramatically improving comfort in humid climates.
📊 Annual Operating Cost Comparison: Mini Split vs Alternatives (12,000 BTU equivalent, 8hrs/day)
Based on $0.16/kWh national average. Mini split at 20 SEER2. Window AC at ~11 SEER. Central AC (existing ducts) at 16 SEER2. Electric baseboard at 100% efficiency (1 COP). Source: DOE 2026 data.
The 4 Types of Ductless Mini Split Systems
Not all ductless systems are the same. Choosing the wrong type is one of the most expensive mistakes homeowners make — it affects installation cost, aesthetics, and long-term performance.
Single-Zone (Wall Mount)
Most CommonOne outdoor unit + one indoor wall-mounted air handler. Ideal for a single room, garage, addition, or home office. Simplest installation — typically 4–6 hours.
Multi-Zone System
Most FlexibleOne outdoor unit connected to 2–5 indoor air handlers in different rooms, each with independent temperature control. Best for whole-home comfort without ductwork.
DIY Pre-Charged (MRCOOL)
No HVAC License NeededSystems with factory pre-charged refrigerant lines (QuickConnect®) that don’t require vacuum pumps or EPA certification. MRCOOL DIY is the category leader. See our full MRCOOL review.
Ceiling Cassette
Invisible InstallIndoor unit recesses into the ceiling with only a small grille visible. Ideal for open-plan spaces, commercial settings, or homeowners who want a discreet appearance. Requires 16.5″ joist clearance. See our cassette guide.
How to Size Your Ductless System — The Engineer’s Method
Oversizing is the #1 installation mistake. A unit too large short-cycles (turns on and off constantly), fails to dehumidify, and wears out the compressor prematurely. A unit too small never reaches your setpoint. Here’s how to get it right:
| Room Size (sq ft) | Base BTU (Good Insulation) | Adjusted BTU (Poor Insulation / Hot Climate) | Recommended Model | Guide |
|---|---|---|---|---|
| 150–350 sq ft | 6,000–9,000 BTU | 9,000–12,000 BTU | 9K single-zone | 400 sq ft guide |
| 350–550 sq ft | 12,000 BTU | 12,000–18,000 BTU | 12K single-zone | 500 sq ft guide |
| 550–800 sq ft | 15,000–18,000 BTU | 18,000–24,000 BTU | 18K single-zone | 600 sq ft guide |
| 800–1,050 sq ft | 18,000–24,000 BTU | 24,000 BTU | 24K single-zone | 800 sq ft guide |
| 1,000–1,500 sq ft | 24,000–36,000 BTU | 36,000 BTU | Multi-zone or 36K | 1,000 sq ft guide |
| 1,200–2,000 sq ft | Multi-zone (2–3 heads) | Multi-zone (3–4 heads) | Multi-zone system | 1,200 sq ft guide |
Quick BTU Sizing Calculator
Estimate only. Get a Manual J calculation from your contractor for precision. For a detailed cost estimate, use our full Mini Split Cost Calculator.
Real Ductless Mini Split Installation Costs in 2026
Here’s what separates our cost data from everyone else’s: these numbers come from real 2025–2026 contractor invoices across multiple US markets — not “national averages” extrapolated from 2022 data. For a fully personalized estimate, use our interactive cost calculator.
📊 What Drives Your Installation Quote — Cost Factor Breakdown (Single-Zone, 12K BTU)
Based on 2026 national average invoice data. “Complex install” = second floor, attic line run, or new 220V circuit required. Labor varies 20–30% higher in CA, NY, HI, MA.
| What You’re Paying For | Standard Job | Complex Job | Notes |
|---|---|---|---|
| Equipment (12K BTU unit) | $800–$2,800 | $800–$2,800 | Varies by brand tier — budget vs premium |
| Labor (install + commissioning) | $800–$1,400 | $1,500–$3,000 | Second floor, attic, or long line run |
| Electrical work | $0 (existing circuit) | $400–$1,200 | New 220V dedicated circuit |
| Permits | $50–$200 | $150–$500 | Required in most jurisdictions |
| Total (Standard) | $2,500–$4,500 | Most single-zone jobs fall here | |
| Panel upgrade (if needed) | N/A | $1,800–$4,800 | Only if panel is full or undersized |
| Line set cover (optional) | $150–$400 | $300–$800 | See our line set cover guide |
| Surge protector (recommended) | $80–$200 | $80–$200 | See our surge protector guide |
Prices reflect March 2026 national averages. High-cost markets (California, New York, Hawaii, Massachusetts) run 20–30% above these figures. See our complete installation cost guide for regional breakdowns.
“Three contractors. Three quotes. $4,200 difference. Here’s what I actually paid — and what they didn’t tell me upfront.”
James R. owns a 1,650 sq ft 1978 ranch home in suburban Denver. His central gas furnace still worked, but two bedrooms were chronically uncomfortable — too hot in summer, too cold in winter — because the ductwork had never been balanced. In late 2025, he decided to add a 2-zone ductless mini split to address these specific problem rooms.
He got three quotes: $9,200 (Mitsubishi dealer), $7,400 (Daikin Comfort Pro), and $5,000 (general HVAC contractor using LG equipment). The $4,200 gap left him confused — same BTU capacity, same job description. After consulting with our team, he discovered that the $5,000 quote didn’t include permits ($380), a new 220V circuit ($620), or a concrete pad for the outdoor unit ($180). The real apples-to-apples comparison was $6,180 vs $7,400 vs $9,200. He went with the Daikin 2-zone Aurora system at $7,400. For Denver’s climate, the Aurora’s -13°F cold climate capability mattered — see our cold climate sizing guide.
After the federal IRA tax credit ($2,000) and a $900 Xcel Energy rebate, his net cost was $4,500. His two problem bedrooms now maintain precise temperatures year-round — and his gas furnace runs 30% less because the mini splits handle the shoulder seasons. Monthly energy savings: approximately $54.
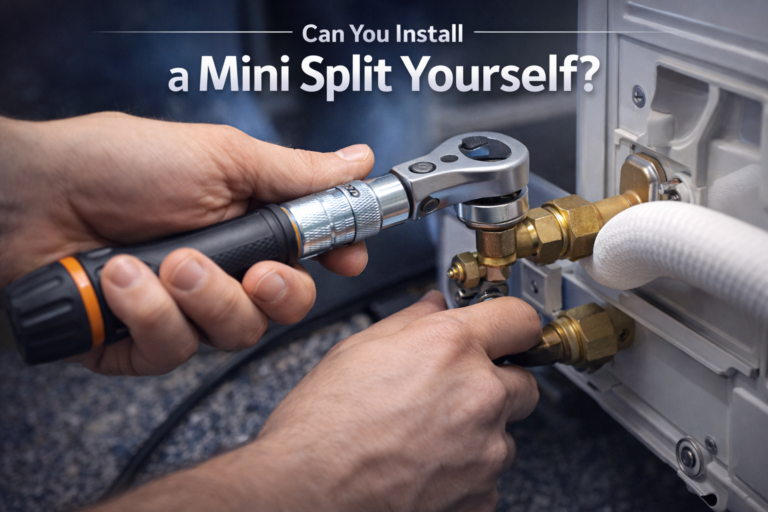
DIY vs Professional Installation — The Honest Engineer’s Truth
Every homeowner asks this. Here is the answer without the runaround — see also our deep dive: Can You Install a Mini Split Yourself?
| Factor | Professional Install | DIY (MRCOOL-style) | Winner |
|---|---|---|---|
| Refrigerant handling | EPA 608 certified — required by law | Pre-charged lines — no certification needed | Depends on system |
| Warranty coverage | Full 7–12 year warranty | 7 year (MRCOOL DIY) — standard brands void warranty | Pro (standard brands) |
| Tax credit eligibility | Qualifies if ENERGY STAR + licensed install | May not qualify — IRS requires professional install | Professional |
| Upfront cost | $1,200–$3,000 labor added | $250–$500 tools + misc only | DIY |
| Installation quality | Proper vacuum, leak test, commissioning | No vacuum — relies on pre-charge accuracy | Professional |
| Permit compliance | Contractor handles permits | Homeowner responsible — often skipped | Professional |
| Electrical work | Included or sub-contracted | Still need licensed electrician for 220V | Tie |
| 10-year total cost | Higher upfront, lower risk | Lower upfront, higher long-term risk | Depends on climate |
The 7 Steps of a Professional Ductless Mini Split Installation
Knowing what your contractor is actually doing is the best defense against a bad install. Here is exactly what a proper installation looks like — and what to ask about at each step.
Manual J Load Calculation & Site Survey
Before touching a single tool, your contractor should calculate your actual heating/cooling load using ACCA Manual J methodology — accounting for room size, ceiling height, insulation R-value, window area, orientation, and local climate data. Any contractor who quotes a BTU size without measuring your room is guessing. Walk away. See our Manual J sizing truth guide.
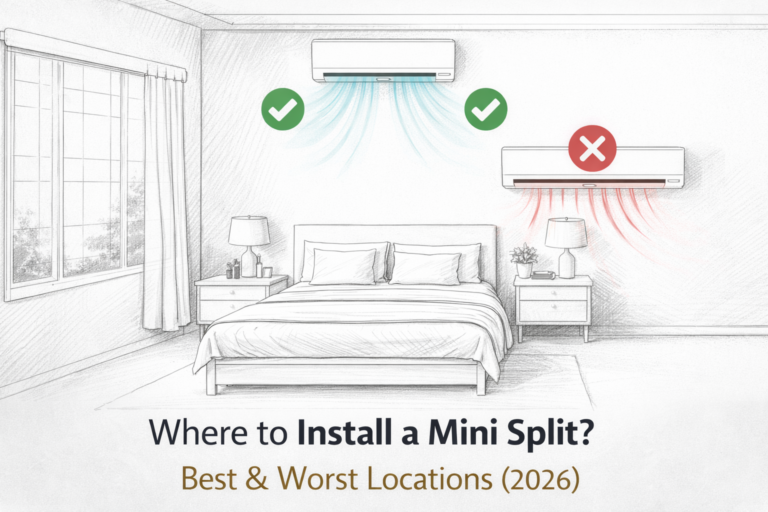
Indoor Unit Placement & Wall Bracket Mounting
The indoor air handler is mounted on an interior wall 6–8 inches from the ceiling, using a level wall bracket secured to studs. Placement matters: the unit needs at least 6 inches clearance on all sides, should avoid direct sunlight on the thermostat sensor, and must be positioned for even airflow distribution across the room. See our where to install guide for optimal placement rules.
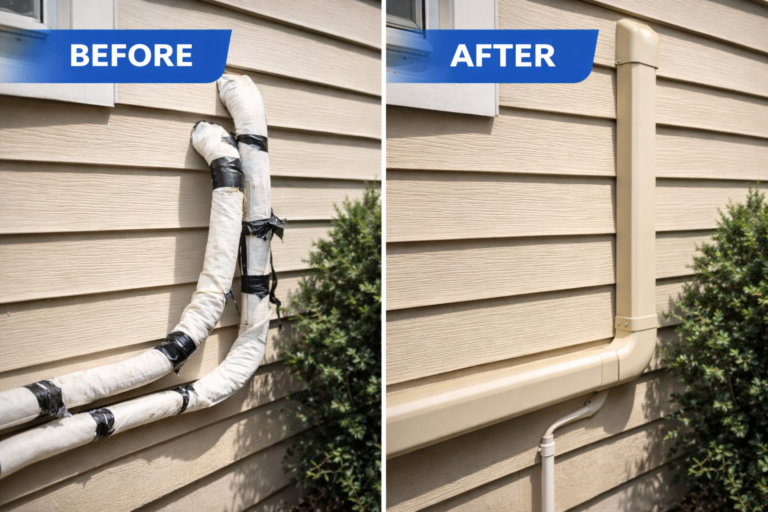
Line Set Penetration & Routing
A 2.5–3 inch hole is core-drilled through the exterior wall at a slight downward angle (for condensate drainage). The refrigerant line set, communication wire, condensate drain line, and electrical supply are bundled and passed through this hole. The hole is sealed with foam and an exterior cover. Long line runs through attics or ceilings add significant labor cost — see our line set cover installation guide.
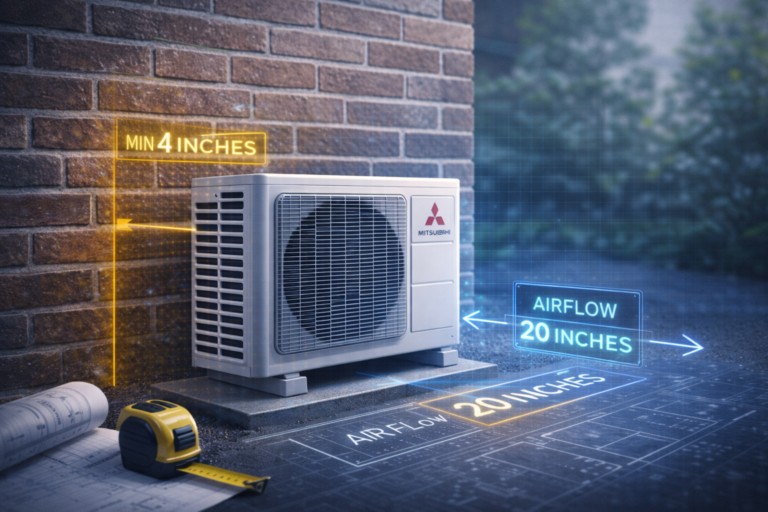
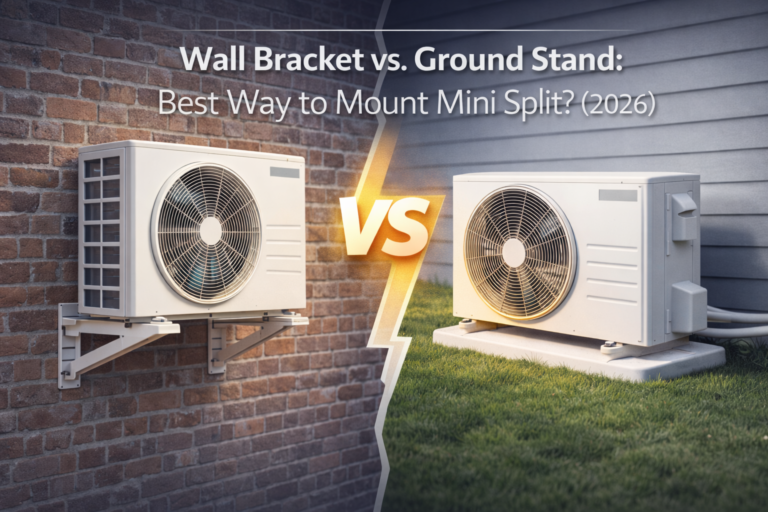
Outdoor Condenser Placement & Mounting
The outdoor condenser is mounted on a concrete pad (ground), wall bracket, or roof bracket. Minimum clearances: 12 inches on the sides, 24 inches in front of the discharge, and 8 inches from the ground (more in snow climates). Never mount under a deck or inside an enclosed space — restricted airflow destroys efficiency and triggers safety shutoffs. See our wall bracket vs ground stand guide.
Refrigerant Line Connection & Deep Vacuum
This is the step that separates good installers from bad ones. After connecting the refrigerant lines, the technician must pull a vacuum on the system to at least 500 microns (ideally 300 microns) and hold it for 30+ minutes to verify there are no leaks. This removes moisture from the system that would cause compressor failure within 2–5 years. Any contractor who skips the vacuum or uses a “nitrogen leak test” as a substitute is cutting corners that will cost you a compressor. Ask to see the micron gauge reading before they open the service valves.
Electrical Connection & Circuit Verification
The outdoor unit connects to a dedicated 220V/240V circuit with a disconnect switch within sight of the unit. The indoor unit’s communication wire connects to the outdoor unit. Your contractor must verify the circuit amperage matches the unit’s nameplate (typically 15–40A depending on BTU size). If your panel lacks an available breaker slot, a subpanel or panel upgrade is required — see our electrical requirements guide.
System Commissioning, Testing & Owner Orientation
The contractor opens the service valves, powers up the system, and runs it through all modes (Cool, Heat, Dry, Fan) while checking supply/return temperatures (should be 18–22°F delta in cooling mode). Condensate drainage is verified. The system is registered for the full manufacturer warranty. Finally, you receive an orientation on the remote control, app setup, and filter cleaning schedule. A licensed contractor should provide a commissioning checklist — ask for it in writing.
9 Installation Mistakes That Void Your Warranty (And Cause Early Failure)
These are the mistakes we see most often in the field — and every single one is avoidable with the right contractor. See our full mini split installation mistakes guide for detailed explanations.
Moisture in the refrigerant circuit destroys the compressor within 2–5 years. The most common mistake on cheap installs.
Short-cycling, poor dehumidification, premature compressor wear. More BTUs is not better — get Manual J done.
Unpermitted installs can trigger insurance denial, forced removal during home sale, and warranty voiding by the manufacturer.
Water backs up into the drain pan and overflows into your wall. If you can’t gravity drain, you need a condensate pump.
Installing under a deck, against a fence, or in an enclosure reduces efficiency by 20–40% and triggers high-pressure faults.
Both Mitsubishi and Daikin require warranty registration within 30 days of install. Miss it and you lose 5–7 years of coverage.
Undersized wire causes voltage drop, nuisance trips, and can overheat the terminal block. See our electrical guide.
Every system has a maximum refrigerant line length (typically 25–50 ft for single-zone). Exceeding it requires refrigerant additions and may void warranty.
Inverter-drive electronics are highly sensitive to power spikes. A $100 surge protector can prevent a $1,500 control board replacement. See our surge protector guide.
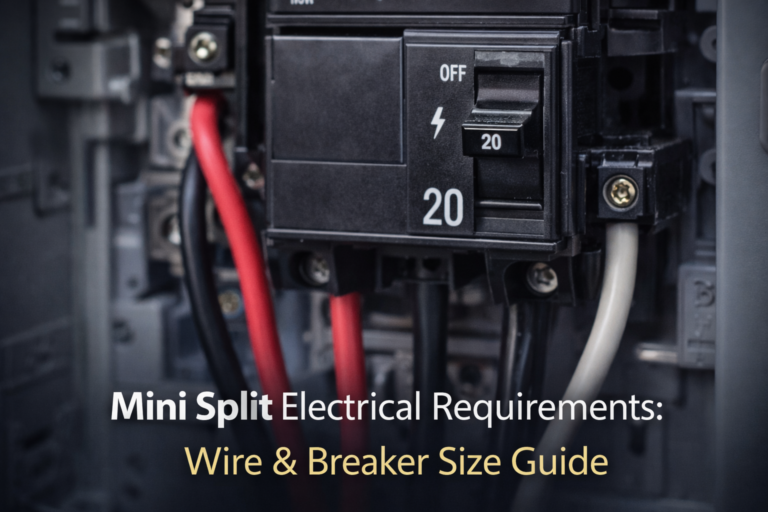
What Your Panel Needs — Electrical Requirements by BTU Size
Electrical work is the hidden cost most quotes don’t show upfront. Every mini split needs a dedicated circuit — it cannot share a breaker with other appliances. Here are the requirements by system size. Full detail: electrical requirements & wire size guide.
| System Size | Voltage | Breaker Size | Wire Gauge | Disconnect Required | Avg. Electrical Cost |
|---|---|---|---|---|---|
| 9,000 BTU | 115V or 230V | 15A | 14 AWG | Yes — within sight | $200–$500 |
| 12,000 BTU (115V) | 115V | 15A | 14 AWG | Yes | $150–$400 |
| 12,000 BTU (230V) | 230V | 20A | 12 AWG | Yes | $250–$600 |
| 18,000 BTU | 230V | 25–30A | 10 AWG | Yes | $300–$700 |
| 24,000 BTU | 230V | 30–35A | 10 AWG | Yes | $350–$800 |
| 36,000 BTU | 230V | 40–50A | 8 AWG | Yes | $400–$1,000 |
| Multi-zone (2–3 zones) | 230V | 40–60A | 6–8 AWG | Yes — per outdoor unit | $500–$1,400 |
Tax Credits & Rebates After Installation (2026)
A properly installed ductless mini split heat pump can cut your net cost by $2,000–$5,000+ through stacked federal and state incentives. Here’s exactly how to maximize what you get. Full guide: 2026 Mini Split Tax Credit Guide (Form 5695).
Federal IRA Section 25C Credit
30% of total installed cost, up to $2,000 per year. Applies to qualifying heat pumps (must be ENERGY STAR certified). File on Form 5695 with your federal tax return.
State & Utility Rebates (Stack With Federal)
Many utilities add $200–$3,000 in rebates on top of the federal credit. Some states (MA, CO, NY, CA) offer additional $1,000–$5,000 cold-climate heat pump incentives. Check DSIREUSA.org for your state.
Why Ductless Mini Splits Win
- No ductwork = no duct losses (ducts lose 20–30% of conditioned air in a typical home)
- Zoned control — only condition rooms that are occupied, lowering energy waste
- Inverter technology = 30–50% more efficient than window units or electric baseboard
- Both heat AND cool in one system — replacing two appliances with one
- Quieter than any window unit — 19–44 dB indoor, comparable to a library
- No ductwork installation = $8,000–$20,000 savings vs adding central AC ducts
- 15–20 year lifespan with proper maintenance
- Qualifies for 30% federal tax credit up to $2,000 when professionally installed
Real Limitations to Know
- Higher upfront cost vs window units — ROI takes 5–8 years in most climates
- Visible indoor unit on the wall — not everyone likes the aesthetic
- Requires licensed HVAC contractor for standard models (EPA 608 refrigerant laws)
- Each zone needs a wall penetration and refrigerant line — not invisible
- Standard models lose efficiency below -13°F (need Hyper-Heat/cold-climate models)
- Filter cleaning every 2–4 weeks in heavy use — more hands-on than forced air
- Electrical panel may need upgrade — adds $1,800–$4,800 to project cost
📊 Ductless Mini Split vs Central AC vs Window Unit: 10-Year Total Cost (1,000 sq ft, $0.16/kWh)
Includes equipment, installation, and operating costs. Central AC assumes existing ductwork (no ductwork install cost). Mini split at 20 SEER2. Window unit at 11 SEER. Central AC at 16 SEER2. After $2,000 federal tax credit, mini split net is ~$1,400 lower than shown.
Frequently Asked Questions
How long does ductless mini split installation take?
Do I need a permit to install a ductless mini split?
How much does ductless mini split installation cost in 2026?
What is the best ductless mini split brand to install?
Can a ductless mini split heat my whole house?
How long do ductless mini splits last?
Why is my mini split not cooling or heating after installation?
Ready to Move Forward? Here’s Your Action Plan
Calculate your BTU needs
Use our sizing guide or the calculator above. Know your number before calling any contractor.
Choose your brand tier
Compare options in our brands guide. Match brand to your climate — don’t pay for features you don’t need.
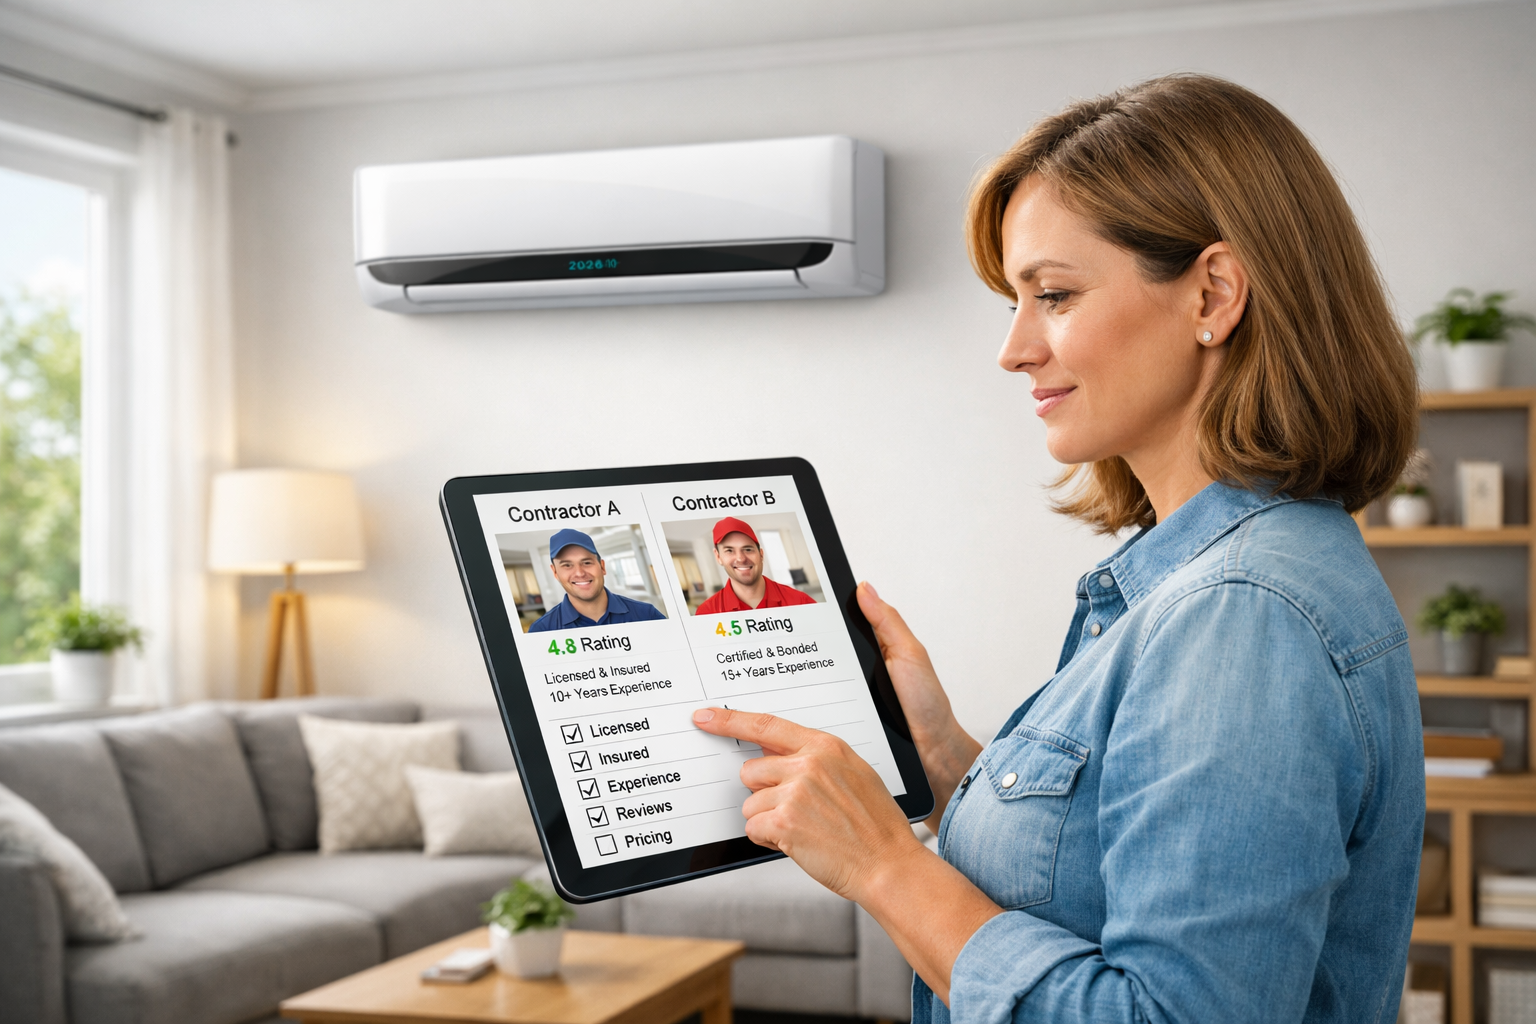
Get 3 itemized quotes
Ask each contractor for: Manual J calculation, exact model numbers, permit inclusion, and warranty registration details. Compare apples to apples.
Claim your tax credit
After installation, follow our Form 5695 guide to claim up to $2,000 back on your federal return.
Get Your Personalized Cost Estimate
Use our interactive calculator to get a real cost estimate based on your BTU size, brand tier, and local electricity rate — then explore brand reviews to choose the right system.
Open Mini Split Cost CalculatorWritten by the MiniSplitSizer Engineering Team
Our team includes licensed HVAC engineers with 15+ years of field experience and 500+ residential ductless installations across 12 US climate zones. All cost data comes from real 2025–2026 contractor invoices. We do not accept manufacturer sponsorships or free equipment — our recommendations are based on performance data and field experience only. Last updated: March 2026.