How to Clean a Mitsubishi Mini Split
(Full Step-by-Step Guide)
As an HVAC engineer, I can tell you a frustrating truth: 60% of Mitsubishi “performance problems” are not mechanical failures—they are dirt buildup.
The good news? Most cleaning can be done safely by a homeowner, provided you know exactly where to touch and, more importantly, where NOT to touch.
Mitsubishi inverter systems are highly advanced, relying on sensitive thermistors and perfectly balanced blower wheels. While general mini split cleaning advice applies, Mitsubishi units require specific care to avoid voiding your warranty or snapping delicate sensor wires. In this guide, I will walk you through the exact deep cleaning protocol used by professionals.
How Often Should You Clean a Mitsubishi Mini Split?
Do not wait for the system to start smelling like a wet gym sock. Follow this engineering timeline to protect your Mitsubishi warranty and maintain peak efficiency:
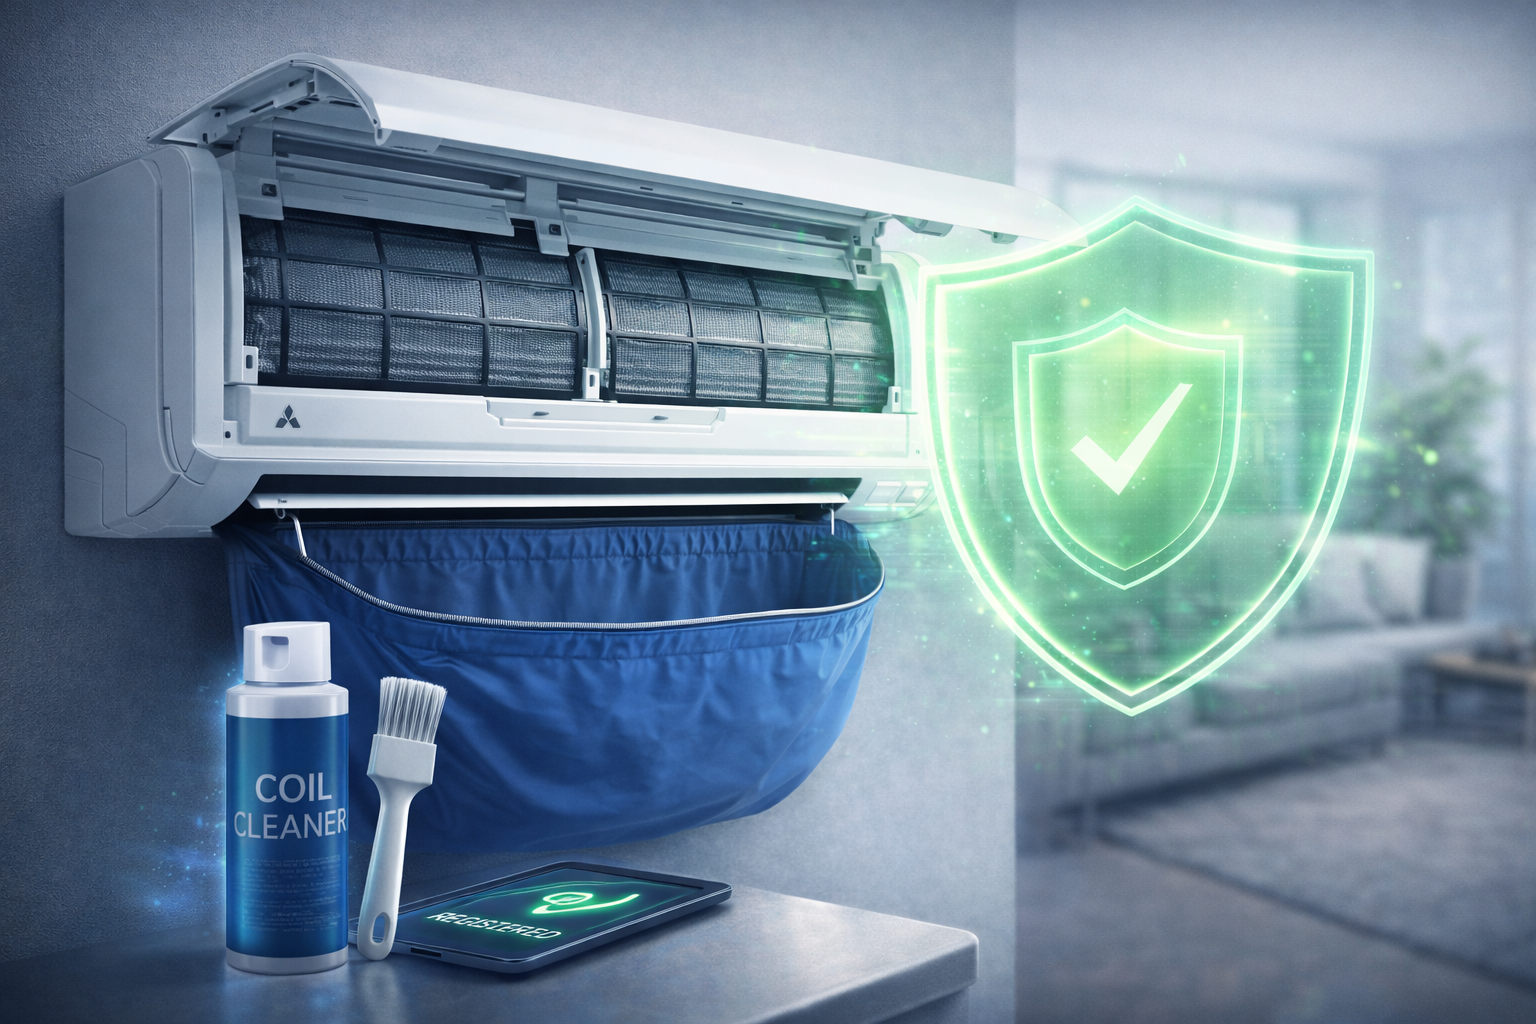
Tools You’ll Need
Before you start taking your $2,000 indoor unit apart, gather the right equipment. Do not use generic household chemicals.
- Phillips head screwdriver
- Non-acidic, foaming coil cleaner (specifically rated for HVAC)
- A mini split cleaning bib kit (to catch the dirty water)
- Soft bristle brush & Fin comb
- Protective gloves & safety glasses
Not sure what to buy? Check out our engineer-approved list of the 5 Best Mini Split Cleaning Kits, Bibs, and Sprays.
Step 1 – Turn Off Power Completely
Critical Safety Step
Turning the unit off with the remote control is not enough. The indoor unit still has live 220V/110V power running to the control board. You must go to your main electrical panel and flip the dedicated breaker for the mini split to the OFF position.
Step 2 – Cleaning Mitsubishi Air Filters
- Lift the front plastic panel of the indoor unit until it clicks open.
- Slide out the two primary mesh filters.
- Vacuum First: Use a brush attachment to gently vacuum the heavy dust. If you wash them immediately, the dust turns into mud and clogs the micro-mesh.
- Wash: Rinse them under lukewarm water in the sink. Use a drop of mild dish soap if greasy.
- Dry: Shake off excess water and let them air dry completely in the shade. Do not put wet filters back into the unit.
Step 3 – Cleaning the Evaporator Coil
The silver fins behind the filters are the evaporator coil. This is where the cooling happens.
- Spray the Cleaner: Liberally spray your non-acidic foaming coil cleaner directly onto the silver fins. Let it sit and foam for 10-15 minutes. It will push the dirt out.
- Do NOT Use a Pressure Washer: The aluminum fins on a Mitsubishi unit are incredibly thin. High-pressure water will flatten them instantly, destroying your system’s efficiency.
- Avoid the Thermistor: Be careful around the small black wire with a copper tip resting against the right side of the coil. This is your temperature sensor. Damaging it will cause immediate system failure.
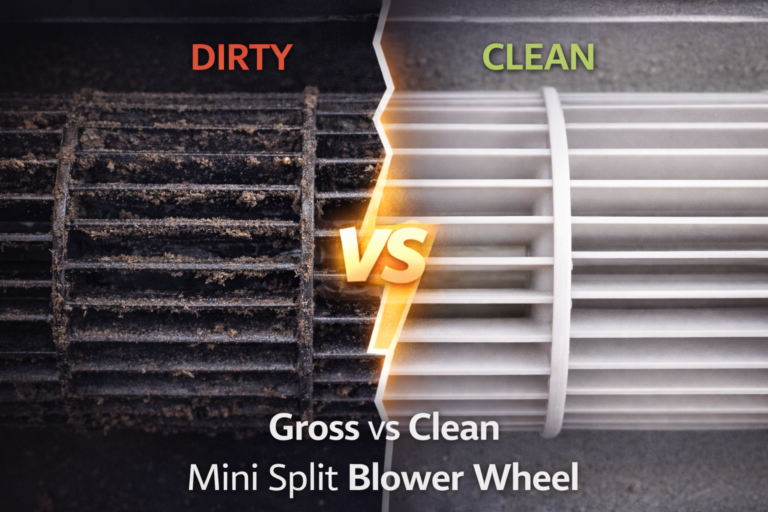
Step 4 – Cleaning the Blower Wheel (Advanced)
The spinning cylinder deep inside the unit is the blower wheel. If your unit smells like mold, this is where it is hiding.
To clean it, you must attach your waterproof cleaning bib to the wall around the unit. Use a pump sprayer with clean water to gently flush the foaming cleaner out of the coil and down through the blower wheel. The dirty water will run down the bib into a bucket.
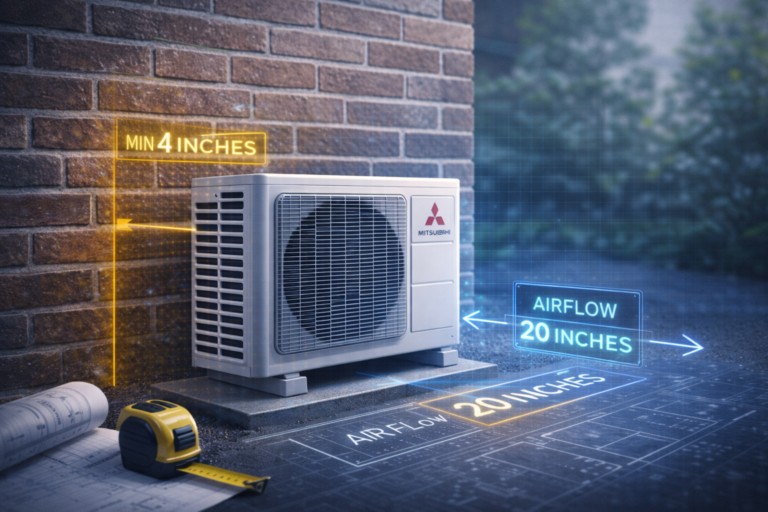
Step 5 – Cleaning the Outdoor Condenser
Go outside to the compressor unit. Remove any leaves, spider webs, or debris from the back and side grilles. Use a standard garden hose (no high-pressure nozzles) to gently rinse the outdoor coil from the top down. Do not bend the fins. A blocked outdoor coil drastically increases electricity usage and strains the compressor.
Case Study: Weak Cooling in a 12k BTU Mitsubishi
The Complaint: A homeowner called complaining of drastically low airflow. The unit was running, but the air felt weak and room wouldn’t drop below 78°F.
The Finding: A contractor previously told them they needed a $400 refrigerant recharge. Upon our inspection, the refrigerant was perfectly fine. However, the blower wheel was coated in a 1/4-inch thick layer of biological biofilm and pet hair, effectively flattening the fan blades so they couldn’t scoop air.
Action & Result:
We performed a heavy chemical deep cleaning. Airflow was instantly restored to 100% capacity. No refrigerant was needed.
Read more about misdiagnosed issues in: Why is my mini split not cooling?
Signs Your Mitsubishi Needs Deep Cleaning
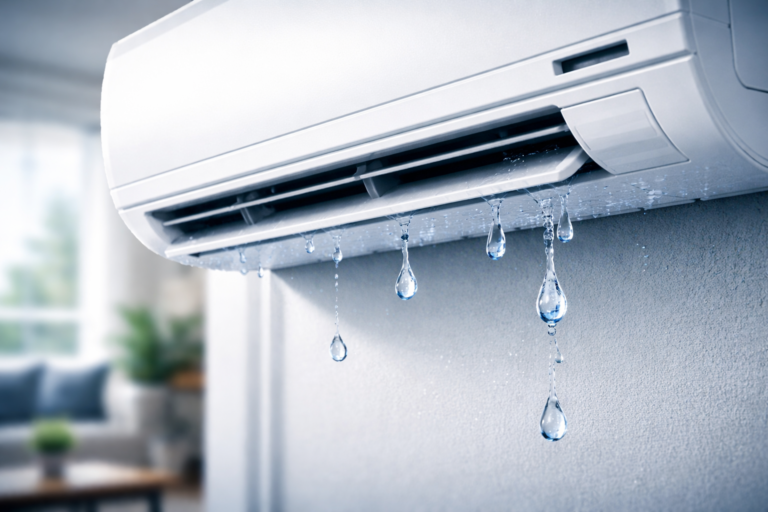
- The “Musty” Smell: Often described as smelling like vinegar or dirty socks. This is active microbial growth inside the drain pan or on the wheel.
- Reduced Airflow: Even on the highest fan setting, the air feels weak.
- Increased Electricity Usage: A dirty coil forces the inverter compressor to run at maximum RPMs constantly to achieve the same cooling effect. Read: Debunking the Bill Shock Myth.
What NOT to Do When Cleaning
- No Bleach: Never spray bleach into the indoor unit. It will rapidly corrode the aluminum coils and degrade the plastic drip pan.
- No High Pressure: Avoid power washers on the indoor or outdoor coils.
- No Wire Pulling: Do not bend or pull the delicate sensor wires (thermistors) attached to the copper piping.
- Know Your Limits: Do not attempt full disassembly (removing the motor casing or drain pan) unless you are mechanically experienced.
Professional Deep Cleaning Cost
If you are not comfortable doing this yourself, hiring an HVAC technician to perform a “bib kit” deep clean typically costs between $150 and $400 per indoor head, depending on your location.
Factor this into your long-term budget. See our Mitsubishi Cost Breakdown.
Does Cleaning Affect Warranty?
Yes, in two ways. Extreme neglect that causes a compressor to overheat and fail will void your warranty. Conversely, if you use highly acidic, corrosive cleaners that eat through the copper lines, the resulting refrigerant leak is also not covered.
Read the full legal breakdown in our Mitsubishi Warranty Guide.
Frequently Asked Questions
How often should I clean my Mitsubishi mini split?
The mesh air filters should be vacuumed and washed every 2 to 4 weeks. The indoor evaporator coil should be cleaned every 6-12 months, and a professional-level deep clean of the blower wheel should happen every 1 to 2 years.
Can I spray water inside the unit?
Yes, but only if the power is completely disconnected at the breaker, you have protected the electrical control board on the right side with plastic, and you are using a low-pressure pump sprayer along with a cleaning bib to catch the runoff.
Why does my Mitsubishi smell like vinegar or mold?
This is called “Dirty Sock Syndrome.” It happens when biological growth (mold/mildew) forms on the dark, damp blower wheel or inside the condensate drain pan. A deep chemical clean is required to eradicate the smell.
Can a dirty filter cause a Mitsubishi error code?
Absolutely. Severe dust buildup restricts airflow, causing the indoor coil to freeze over. This commonly triggers temperature sensor faults, such as the P6 error code, shutting the system down to protect the compressor.